
Security Groups
Overview
This advanced security setting allows you to configure security settings for groups of employees. These group settings can then be applied to the access a User may already have.
For example, you may set up a Security Group containing 'senior-level' employees, adding Policies which specify that Pay Items, Banking and Deductions screens are not visible for this Security Group (i.e. this group of employees). Then, for a User who is able to see the Employee files for those employees, you can include the new Security Group setting. This means they will not be able to see any details relating to pay for these senior-level employees.
Limitations
The restrictions you configure here apply to the Employee files only. So although Users cannot view pay details in the employee's file, if they have other appropriate security settings, they would be able to get access to the information in, say, Data Explorer or Report Explorer. Therefore, if you wish to use the Security Groups function, it is important to take a holistic approach to security across HR3's hr and kiosk modules. We strongly recommend seeking advice from your HR3 consultant prior to activating 'Security Groups'.
- The first step to utilising Security Groups is to activate the feature: see System Preferences - Security
- Next you will need to define your Security Groups: see Maintain Company Details - Security Groups
- Add employees to the Security Groups setting: see Employee file - Security
- Finally you assign the Security Groups setting to Roles: see Access Restrictions.
Each Role has associated Policies which specify its access restrictions. Users are then assigned Role(s) - this defines the user's access restrictions. By assigning a Security Group to the User's Role, you are specifically applying the restrictions to the employees within the Security Group.
Employee Screen
Once the Security Group model is activated, and Security Groups have been assigned to User's Roles, this will affect how the Employee screens will look. Different screen configurations will be used for different employees, depending on which Security Groups the employees belong to. Therefore, while a user might view one employee file with the complete listing of nodes and tabs, restrictions may be in place in another employee file so that the user is not able to see certain areas, such as the Pay Items, Deductions and Banking nodes. Regardless of the configuration of the employee file for the current employee, it will re-configure itself when the next employee is selected.
Note: Some screens will need to be 'switched off' via normal security settings. For example, you should not grant access to the Templates screen to a restricted user: even if you've hidden access to the Pay Items section of the employee screen, the Templates screen shows the employees that are currently assigned to each Template.
Examples
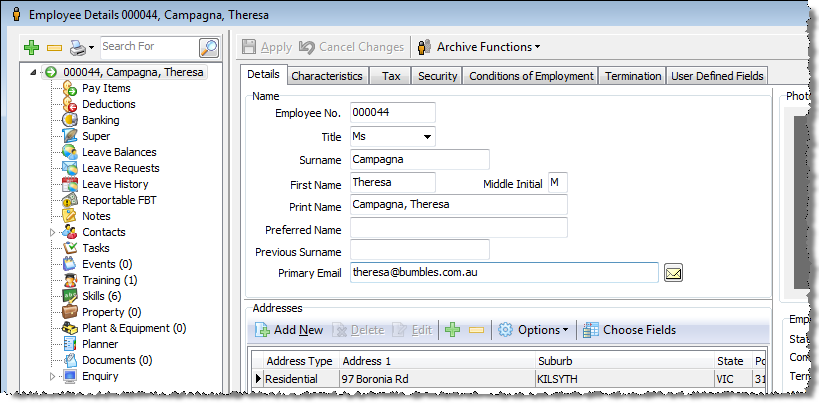
For example, Theresa Campagna is assigned to the 'Red' Security Group. In turn, this has been added to a Role with Policies which restrict Pay Items and Banking, etc. Therefore when user (B) opens Theresa's employee file, they see it like this:

Notice that some nodes are missing from the tree; in particular Pay Items and Banking, and they cannot make changes to the existing data in the Details tab.
